
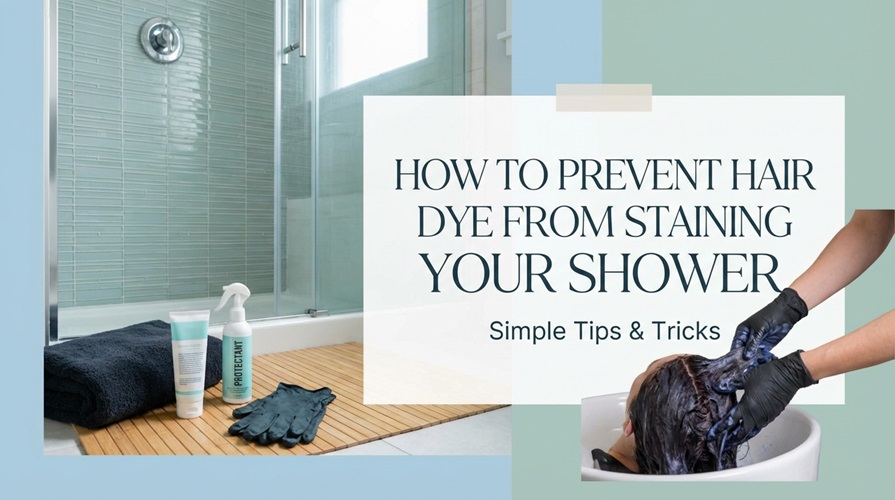
You can prevent hair dye from staining your shower by preparing the area with protective barriers, using petroleum jelly on skin and fixtures, wearing proper protective gear, applying dye methodically, and cleaning spills immediately. The key is preparation before you start and quick action if anything drips.
Hair dye contains pigments designed to penetrate and bond permanently—exactly what you don’t want happening to your shower tiles, grout, or bathtub. With the right preventive steps, you can color your hair at home without turning your bathroom into a crime scene.
Here’s everything you need to know to keep your shower stain-free.
The Quick Prevention Checklist
Before you start dyeing:
→ Cover shower floor and walls with plastic sheeting or old towels
→ Apply petroleum jelly to fixtures, caulk lines, and grout
→ Wear old clothes and disposable gloves
→ Have damp cloths ready for immediate spill cleanup
→ Ensure good ventilation to prevent airborne dye particles
→ Work in the center of the tub, away from walls
During application:
→ Section hair to control dye placement
→ Apply slowly and deliberately
→ Keep dye bottle upright when not in use
→ Wipe drips immediately
After dyeing:
→ Rinse surfaces before dye can set
→ Clean any spots with appropriate cleaners
→ Remove protective barriers carefully
Why Hair Dye Stains Showers So Easily
Understanding why staining happens helps you prevent it more effectively.
Porous Surfaces Absorb Dye
Grout, natural stone, older tiles, and worn acrylic surfaces contain microscopic pores. Hair dye penetrates these pores and bonds at the molecular level—the same way it bonds to hair. Once absorbed, stains become extremely difficult to remove.
Most vulnerable surfaces:
- Grout lines (especially light-colored or unsealed)
- Natural stone (marble, granite, travertine)
- Older porcelain with worn glazing
- Textured acrylic or fiberglass
- Silicone caulk and sealants
Dye Chemistry Works Against You
Hair dye contains oxidative chemicals designed for permanent bonding. These same properties that make color last in your hair also make stains persistent on bathroom surfaces.
Factors that increase staining:
- Darker colors contain more pigment
- Permanent dyes have stronger bonding agents
- Longer contact time allows deeper penetration
- Heat and steam open pores in materials, increasing absorption
Common Ways Dye Reaches Surfaces
| Source | How It Happens |
|---|---|
| Drips from hair | Dye runs down during application or processing |
| Splatter from bottle | Squeezing too hard or sudden movements |
| Rinsing | Colored water splashes onto walls and fixtures |
| Transfer from tools | Brushes, combs, and applicators touch surfaces |
| Airborne particles | Steam carries microscopic dye droplets |
| Hand contact | Touching surfaces with dye-covered gloves |
Complete Prevention Guide: Step by Step
Step 1: Prepare Your Space
Protect the Floor and Walls
Cover all vulnerable surfaces before opening any dye products:
- Plastic drop cloths: Inexpensive, waterproof, and disposable. Tape edges to prevent shifting.
- Old dark towels: Absorb drips effectively. Use towels you don’t mind staining permanently.
- Garbage bags (cut open): Budget-friendly alternative to plastic sheeting.
- Newspaper: Works for floor coverage but can become slippery when wet.
Pro tip: Extend coverage higher than you think necessary. Dye splatters travel farther than expected, especially during rinsing.
Create Barriers on Fixtures
Apply petroleum jelly (Vaseline) or a barrier cream to:
- Faucet handles and spout
- Drain cover and surrounding area
- Caulk lines and grout near your work area
- Shower door tracks or curtain rod
- Any chrome or metal fixtures
The petroleum jelly creates a protective film that prevents dye from directly contacting surfaces. Wipe it away easily after you finish.
Cover What You Can’t Coat
- Remove bath mats, loofahs, and toiletries from the shower
- Cover mirrors with plastic or old towels
- Move shampoo bottles and soap out of the splash zone
- Consider covering the toilet if it’s near the shower
Step 2: Prepare Yourself
Wear Appropriate Protection
- Disposable gloves: Essential. Nitrile gloves work better than latex for dye resistance.
- Old dark clothing: Shirt you don’t care about or a dedicated dyeing robe.
- Plastic cape or garbage bag poncho: Protects shoulders and back.
- Hair clips: Section hair to control application.
Apply Skin Barrier
Before starting, apply petroleum jelly or barrier cream along your:
- Hairline (forehead, temples, behind ears)
- Neck and upper shoulders
- Tops of ears
This prevents skin staining and makes cleanup easier.
Step 3: Control the Application Process
Section Your Hair
Divide hair into manageable sections using clips. This allows:
- Precise dye placement
- Less product waste
- Reduced dripping
- Better coverage with less mess
Apply Methodically
Work slowly and deliberately:
- Hold the dye bottle close to your head, not at arm’s length
- Squeeze gently—sudden pressure causes splatters
- Apply to roots first, then work through lengths
- Keep saturated hair twisted or clipped to prevent dripping
- Wipe the bottle nozzle between sections
Contain the Processing Time
While dye processes:
- Stay in one position to minimize drip spread
- Keep a towel around your shoulders
- Don’t lean against walls or fixtures
- Consider sitting on a covered surface outside the shower if possible
Step 4: Rinse Strategically
Rinsing is when most staining occurs. Colored water goes everywhere.
Pre-Rinse Preparation
- Check that protective barriers are still in place
- Have clean water ready to immediately rinse any surface splashes
- Position yourself in the center of the tub
Rinsing Technique
- Start with lukewarm water (hot water can set stains faster)
- Keep your head tilted back so water runs straight down
- Use low water pressure to minimize splashing
- Direct the stream away from walls
- Continue until water runs completely clear
Immediate Surface Rinse
As soon as hair rinsing is complete:
- Spray down all shower walls with clean water
- Rinse fixtures and the tub floor
- Check for any visible dye spots
- Clean spots immediately before they set
Step 5: Post-Dye Cleanup
Remove Protective Barriers Carefully
- Fold plastic sheeting inward to contain any pooled dye
- Bag and dispose of disposable materials immediately
- Wash reusable towels separately in hot water
Final Surface Wipe
Even if you don’t see stains:
- Wipe down all shower surfaces with a damp cloth
- Pay special attention to grout lines and textured areas
- Clean fixtures and remove petroleum jelly
- Rinse the drain area thoroughly
Best Products for Preventing and Removing Hair Dye Stains
Prevention Products
| Product Type | Purpose | When to Use |
|---|---|---|
| Petroleum jelly | Creates protective barrier | Apply before dyeing |
| Plastic drop cloths | Protects floors and walls | Set up before starting |
| Nitrile gloves | Hand protection | Wear throughout process |
| Barrier cream (salon-grade) | Skin and surface protection | Apply before dyeing |
| Hair dye stain remover wipes | Quick spot treatment | Keep nearby during process |
Stain Removal Products
For Fresh Stains (within minutes):
- Rubbing alcohol
- Nail polish remover (acetone-free for acrylic surfaces)
- Magic Eraser
- Dish soap and baking soda paste
For Set Stains:
- Oxygen bleach (OxiClean)
- Hydrogen peroxide
- Commercial hair dye stain removers
- Baking soda and vinegar combination
How to Remove Hair Dye Stains from Your Shower
Even with precautions, accidents happen. Here’s how to address stains based on how long they’ve been there.
Fresh Stains (Within 10 Minutes)
Act immediately for best results:
- Wipe with rubbing alcohol — Saturate a cloth and gently rub the stain
- Apply dish soap — Work into the stain with a soft brush
- Rinse thoroughly — Remove all cleaning product residue
- Repeat if needed — Fresh stains usually lift with 1-2 treatments
Recent Stains (Within 24 Hours)
Baking Soda Method:
- Make a paste with baking soda and water (consistency of toothpaste)
- Apply to stained areas generously
- Let sit 15-20 minutes
- Scrub gently with a soft brush or sponge
- Spray with white vinegar (it will fizz)
- Let sit another 10 minutes
- Scrub and rinse thoroughly
Oxygen Bleach Method:
- Mix oxygen bleach powder with warm water per package directions
- Apply to stains
- Let sit 30-60 minutes
- Scrub and rinse
Set Stains (More Than 24 Hours)
Older stains require more aggressive treatment:
For Tile and Porcelain:
- Apply hydrogen peroxide directly
- Cover with plastic wrap to prevent evaporation
- Let sit 2-4 hours or overnight
- Scrub with baking soda paste
- Rinse and repeat if needed
For Grout:
- Make a paste of oxygen bleach and water
- Apply with an old toothbrush
- Let sit 1-2 hours
- Scrub vigorously
- Consider grout-specific stain removers
For Acrylic and Fiberglass:
- Avoid abrasive cleaners that can scratch
- Use acetone-free nail polish remover
- Apply Magic Eraser gently
- Try automotive rubbing compound for stubborn spots
For Silicone Caulk:
- Unfortunately, dye often penetrates permanently
- Try bleach gel applied directly
- If staining persists, replacement may be necessary
Surface-Specific Prevention Tips
Different shower materials require different approaches.
Tile and Grout
Extra precautions needed:
- Seal grout lines before dyeing sessions (or annually)
- Apply petroleum jelly directly on grout lines
- Use extra floor coverage—grout absorbs quickly
Best cleaning approach:
- Oxygen bleach for stubborn stains
- Avoid acidic cleaners that can etch grout
Acrylic and Fiberglass
Extra precautions needed:
- These surfaces scratch easily, making them more stain-prone
- Cover more extensively than other materials
- Never use abrasive cleaners
Best cleaning approach:
- Gentle dish soap and soft cloths
- Magic Eraser (test in hidden area first)
- Avoid acetone and harsh chemicals
Natural Stone
Extra precautions needed:
- Most vulnerable surface type
- Consider dyeing outside the shower entirely
- Apply stone sealer before dyeing sessions
Best cleaning approach:
- pH-neutral stone cleaners only
- Poultice method for deep stains
- Professional cleaning for valuable stone
Porcelain and Enamel
Extra precautions needed:
- Older tubs with worn enamel stain easily
- Check for chips or worn areas
- Cover thoroughly
Best cleaning approach:
- Baking soda paste
- Hydrogen peroxide
- Avoid abrasives that damage enamel
Alternative Dyeing Locations
Sometimes the best shower protection is dyeing elsewhere.
Better Options:
- Kitchen sink: Easier to protect with garbage bags, lower splatter risk
- Outdoor area: Eliminates indoor staining concerns entirely
- Garage or utility sink: Industrial surfaces handle stains better
- Over bathtub (not in shower): More control, less wall splatter
Salon Visits:
For stubborn-to-apply colors or if you’ve had staining problems, professional application may be worthwhile. Salons have proper drainage and surfaces designed for dye exposure.
Long-Term Shower Protection Strategies
Seal Vulnerable Surfaces
Grout Sealing:
- Apply penetrating grout sealer 1-2 times per year
- Creates invisible barrier against stain absorption
- Takes 10-15 minutes for average shower
- Must be reapplied after deep cleaning
Stone Sealing:
- Natural stone requires regular sealing
- Use stone-specific sealers
- Frequency depends on stone type and use
Regular Maintenance
Good shower maintenance makes occasional dye cleanup easier:
- Clean shower weekly to prevent buildup that traps stains
- Squeegee walls after each use to reduce mineral deposits
- Ensure good ventilation to prevent moisture damage
- Address any chips, cracks, or worn areas promptly
Consider Shower Upgrades
If you dye hair regularly:
- Darker grout: Hides minor staining
- Large-format tiles: Fewer grout lines
- Solid surface materials: Non-porous, easier to clean
- Porcelain over natural stone: More stain-resistant
Frequently Asked Questions
How do I protect my shower drain from hair dye stains?
Apply petroleum jelly around the drain cover before dyeing. After rinsing, run hot water for several minutes to flush dye from the drain. For extra protection, cover the drain with plastic wrap during application, removing only for rinsing.
Will hair dye stain a white bathtub?
White bathtubs are highly susceptible to visible staining, especially from dark hair dyes. Porcelain and enamel tubs resist staining better than acrylic, but all white surfaces require thorough protection and immediate cleanup of any drips.
How long does hair dye take to stain shower surfaces?
Hair dye can begin bonding to porous surfaces within minutes. Grout can stain in under 5 minutes. Sealed or non-porous surfaces give you more time, but immediate cleanup is always recommended. Fresh stains are dramatically easier to remove than set stains.
Does permanent hair dye stain worse than semi-permanent?
Yes. Permanent dyes contain stronger oxidizing agents and more concentrated pigments designed for lasting bonds. Semi-permanent and temporary dyes stain less severely and are easier to remove, though they can still discolor porous surfaces.
Can I use bleach to remove hair dye stains from my shower?
Chlorine bleach works on some surfaces but can damage others. It’s generally safe for white porcelain and tile but can discolor colored grout and damage acrylic or fiberglass. Oxygen bleach (OxiClean) is safer for most surfaces and effective on dye stains.
What’s the best way to protect grout from hair dye?
Apply grout sealer before dyeing sessions—it creates a protective barrier. Additionally, apply petroleum jelly directly on grout lines before each dyeing session. After dyeing, rinse grout immediately and clean any visible color before it sets.
Should I dye my hair in the shower or somewhere else?
Showers are convenient but risk staining. If you’ve had staining problems, consider dyeing at a kitchen sink or outside. If using the shower, ensure thorough surface protection, work in the center of the space, and rinse surfaces immediately after rinsing your hair.
How do I remove hair dye from silicone caulk?
Silicone caulk is notoriously difficult to clean once stained. Try applying bleach gel directly and letting it sit for 30 minutes. If staining persists, removal and replacement may be the only solution. Prevent future staining by applying petroleum jelly to caulk lines before dyeing.
Quick Reference: Prevention Checklist
Print this or save it for your next dyeing session:
Supplies to Gather:
- Plastic sheeting or old towels
- Petroleum jelly
- Disposable gloves
- Old dark clothing
- Hair clips for sectioning
- Damp cloths for immediate cleanup
- Spray bottle with clean water
Before Starting:
- Cover shower floor completely
- Protect lower walls
- Apply petroleum jelly to fixtures and grout
- Remove all toiletries from shower
- Apply barrier cream to skin
During Dyeing:
- Work slowly and deliberately
- Keep hair sectioned
- Wipe drips immediately
- Stay in center of tub
After Rinsing:
- Spray down all walls immediately
- Wipe fixtures clean
- Remove protective barriers carefully
- Final wipe of all surfaces
Wrap Up
Preventing hair dye stains requires preparation before you start and vigilance throughout the process. The effort invested in covering surfaces, applying protective barriers, and cleaning immediately saves hours of stain-removal frustration later.
Key takeaways:
- Cover more surfaces than you think necessary
- Petroleum jelly is your best friend for protecting fixtures and grout
- Work slowly and methodically to minimize drips
- Rinse surfaces immediately after rinsing your hair
- Address any stains within minutes for easiest removal
With proper preparation, you can dye your hair at home without sacrificing your shower’s appearance. The few extra minutes of setup are worth the stain-free results.
Happy coloring!