
Kitchen cabinets without visible screws are attached using one of three methods—concealed screws hidden behind caps or plugs, hidden fasteners like cam locks or clips, or construction adhesive. Identifying which method your cabinets use determines your removal approach.
Most modern cabinets hide their attachment hardware for a cleaner appearance. Once you understand where to look and what tools to use, removal is straightforward even without visible screws.
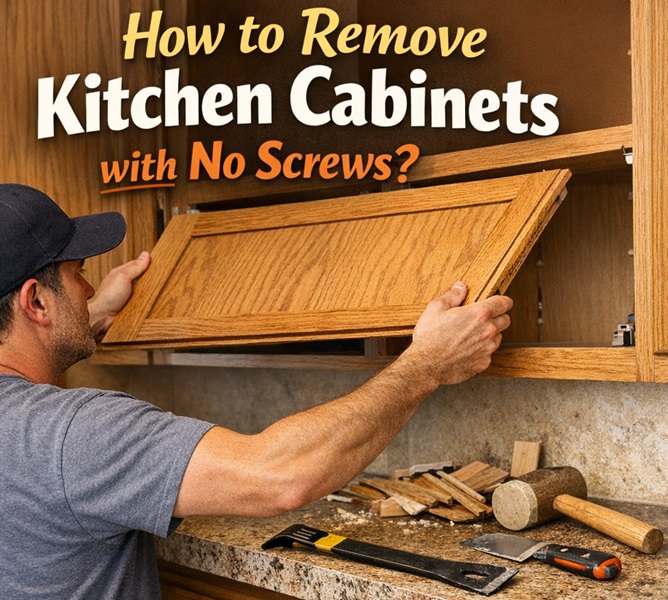
Here’s how to identify your cabinet attachment method and remove them safely.
Why You Can’t See Any Screws
Before removing cabinets, understanding how they’re attached prevents damage to cabinets and walls.
Concealed Screws
Most common in quality cabinetry. Screws are installed from inside the cabinet, through the back panel or hanging rail, into wall studs. From outside, you see nothing.
Where to find them:
- Inside the cabinet, along the top back edge (hanging rail)
- Behind decorative trim or filler strips
- Under small plastic or wood caps that match cabinet color
- Inside hinge mounting plates
Hidden Fasteners (Cam Locks, Clips, Brackets)
Common in modular and ready-to-assemble (RTA) cabinets. European-style cam locks connect cabinet boxes together. Metal brackets or clips attach cabinets to wall-mounted rails.
Where to find them:
- Inside cabinet boxes at connection points between adjacent cabinets
- Behind cabinet backs on metal hanging rails
- At corner joints where cabinet panels meet
Construction Adhesive
Used alone or combined with mechanical fasteners. Some installers apply construction adhesive (Liquid Nails, PL Premium) between cabinet backs and walls for extra security.
Signs of adhesive attachment:
- No screws found inside cabinet after thorough inspection
- Cabinet feels solidly bonded to wall with no movement
- Slight gap or adhesive residue visible where cabinet meets wall
Combination Methods
Many installations use multiple attachment methods. Screws through hanging rail into studs plus adhesive on cabinet back. Cam locks connecting cabinets plus screws into wall.
Expect to encounter more than one attachment type during removal.
Tools You’ll Need
Basic tools for most cabinet removals:
- Phillips and flathead screwdrivers
- Cordless drill with appropriate bits
- Putty knife (stiff blade, 3-4 inch width)
- Pry bar (flat, 12-18 inch length)
- Utility knife
- Rubber mallet
- Flashlight or headlamp
- Pliers
- Safety glasses and work gloves
For adhesive-attached cabinets:
- Oscillating multi-tool with scraper blade
- Heat gun (optional, helps soften adhesive)
- Adhesive remover solvent
- Scoring tool or razor blade
For heavy cabinets:
- Cabinet jack or support props
- Second person for assistance
Kitchen Cabinets removing methods:

Method 1: Removing Cabinets with Concealed Screws
This is the most common attachment method in site-built and semi-custom cabinets.
Step 1: Empty and Prepare Cabinets
Remove everything from inside cabinets—dishes, food, shelf liners. Remove adjustable shelves. This reduces weight and provides clear access to interior.
For wall cabinets: Remove doors first by unscrewing hinges from door (not cabinet). Set doors aside safely.
For base cabinets: Disconnect plumbing (sink cabinet), unplug appliances (dishwasher, disposal), remove drawers by lifting up and pulling out.
Step 2: Locate Hidden Screws
Check these locations with flashlight:
Top hanging rail: Look inside cabinet at very top. Most wall cabinets have a horizontal rail (solid wood or plywood strip) running across the back. Screws go through this rail into wall studs. You’ll see screw heads along this rail.
Back panel: Some cabinets have screws through the back panel directly into studs. Look for slight dimples or filled holes in cabinet back.
Under caps or plugs: Examine cabinet sides, face frame, and corners for small plastic or wood caps. Pop these off with flathead screwdriver to reveal screw heads.
Behind trim pieces: Decorative trim, light rail molding, or filler strips may cover screws. Gently pry these off first.
Step 3: Remove Cabinet-to-Cabinet Screws
Cabinets are typically screwed together before being attached to wall. Look inside cabinet at the stiles (vertical face frame pieces) where adjacent cabinets meet. Screws connect cabinet boxes together through these stiles.
Remove these screws first to separate individual cabinet boxes. This makes removal easier, especially for long runs of cabinets.
Step 4: Support the Cabinet
Critical safety step for wall cabinets. Before removing wall attachment screws, support the cabinet weight.
Options:
- Have helper hold cabinet from below
- Place cabinet jack or adjustable prop under cabinet
- Stack boxes or use step stool with padding to support cabinet bottom
Never remove wall screws without support—unsupported cabinets can fall suddenly.
Step 5: Remove Wall Attachment Screws
With cabinet supported, unscrew fasteners attaching cabinet to wall. Start with screws at one end, working toward the other.
Typical screw count: 2-4 screws per wall cabinet, 3-6 screws per base cabinet.
Once all screws are removed, carefully lift cabinet away from wall and lower to floor.
Step 6: Check for Additional Fasteners
Some installations include hidden brackets, clips, or adhesive as secondary attachment. If cabinet doesn’t release after removing visible screws, look for:
- Metal L-brackets at top corners
- Clips engaging a wall-mounted rail
- Adhesive bond requiring prying (see Method 2)
Method 2: Removing Cabinets with Adhesive Attachment
Requires more patience and care to prevent wall damage.
Step 1: Cut Perimeter Seal
Using utility knife, score along all edges where cabinet meets wall, ceiling, or adjacent cabinets. This cuts through paint, caulk, and any adhesive at the visible seam.
Score multiple passes to cut through buildup. This prevents tearing wall surface when cabinet is pried away.
Step 2: Start at Top Corner
Insert stiff putty knife between cabinet back and wall at upper corner. Tap handle gently with rubber mallet to work blade behind cabinet.
Work slowly and methodically. Adhesive bonds are strong—forcing too quickly damages drywall.
Step 3: Work Along Cabinet Back
Once putty knife creates initial gap, switch to flat pry bar for more leverage. Work along top edge first, then down sides.
Technique: Insert pry bar, apply gentle outward pressure, move 3-4 inches, repeat. Gradually break adhesive bond across entire cabinet back.
For stubborn adhesive:
- Use oscillating multi-tool with scraper blade to cut through adhesive
- Apply heat with heat gun (300-400°F) to soften adhesive before prying
- Work in sections rather than trying to release entire cabinet at once
Step 4: Support and Remove
As adhesive releases, cabinet will become loose. Ensure support is in place before final section releases.
Once fully detached, carefully lower cabinet to floor.
Step 5: Clean Adhesive Residue
Adhesive will remain on wall (and possibly cabinet back). Remove while fresh if possible—cured adhesive is harder to clean.
Removal options:
- Plastic scraper for bulk removal (won’t gouge drywall)
- Adhesive remover solvent (Goo Gone Pro-Power, 3M Adhesive Remover)
- Heat gun to soften, then scrape
- For drywall, sometimes easier to skim coat over residue than remove completely
Method 3: Removing Cabinets with Hidden Fastener Systems
Common in European-style frameless cabinets and modern RTA cabinets.
Understanding the System
Rail-and-bracket systems: Wall-mounted metal rail (often called French cleat or hanging rail) runs horizontally along wall. Brackets attached to cabinet backs hook onto this rail. Cabinets lift off rather than unscrew.
Cam lock systems: Connect cabinet boxes together, not to wall. Large plastic discs with arrow markings visible inside cabinets. Turn cam with screwdriver to release.
Step 1: Identify Fastener Type
For rail systems: Look inside cabinet near top back. You’ll see metal brackets with hooks engaging a metal rail attached to wall.
For cam locks: Look inside cabinet where side panels meet top/bottom. Circular discs (15-35mm diameter) with slot for screwdriver indicate cam locks.
Step 2: Release Brackets (Rail System)
Some bracket systems have release mechanisms—push tabs, lift levers, or set screws. Others simply lift off.
Test first: Try lifting cabinet slightly. If it moves upward and releases from rail, it’s a lift-off system.
If locked: Look for set screw on bracket, release tab, or locking lever. Consult manufacturer documentation if available.
Step 3: Release Cam Locks
Insert flathead screwdriver into cam disc slot. Turn to release position (usually 90-180 degrees counterclockwise). Arrow on cam indicates locked/unlocked positions.
Release all cams connecting cabinet to adjacent cabinets before attempting removal.
Step 4: Lift Off and Remove
With brackets or cams released, lift cabinet straight up and off the rail system. Have helper assist with heavy or large cabinets.
Note: Wall-mounted rail typically stays in place—remove separately if desired by unscrewing from studs.
Preventing Wall Damage During Removal
Common damage and how to avoid it:
Drywall Tears
Cause: Prying too aggressively, adhesive pulling paper face off drywall.
Prevention: Score perimeter cuts deeply before prying. Work slowly. Use heat to soften adhesive. Accept that some minor damage may occur—plan for patching.
Screw Hole Damage
Cause: Screws in drywall (not studs) pull out, enlarging holes.
Prevention: Not much you can do if original installation missed studs. Holes can be patched with spackle and mesh tape.
Paint Damage
Cause: Cabinet removal pulls paint from wall surface.
Prevention: Score paint line with utility knife before removal. Plan to touch up paint after cabinet removal regardless.
Stud Damage
Cause: Large screws or multiple holes in same stud location weaken wood.
Prevention: Remove screws carefully without stripping or enlarging holes. Minor damage doesn’t affect structural integrity.
After Removal: Wall Repair
Standard repair process for walls after cabinet removal:
Fill screw holes: Apply lightweight spackle, let dry, sand smooth. For larger holes, use mesh patch tape plus joint compound.
Repair drywall tears: If paper facing is torn, apply thin coat of joint compound over damaged area, let dry, sand, repeat until smooth.
Address adhesive residue: Scrape what you can, skim coat remaining residue with joint compound if removal damages drywall surface.
Prime and paint: Use stain-blocking primer on repaired areas before painting. Wall area behind cabinets may be different color or unfinished—plan to repaint entire wall section.
Cost estimate for DIY wall repair: $30-75 in materials for typical cabinet removal project (spackle, compound, sandpaper, primer, paint).
When to Call a Professional
Consider hiring help if:
- Cabinets are unusually large, heavy, or in difficult locations
- Plumbing or electrical work is needed (sink cabinets, range hoods)
- Walls are plaster instead of drywall (requires different repair techniques)
- You’re unsure about attachment method after inspection
- Structural concerns exist (load-bearing walls, header modifications)
- Extensive wall damage occurs during removal
Professional cabinet removal cost: $200-500 for typical kitchen, depending on cabinet count and complexity.
Frequently Asked Questions
How long does cabinet removal take?
For a DIYer, expect 2-4 hours for a typical kitchen (10-15 cabinets). Wall cabinets are faster than base cabinets due to fewer plumbing/appliance connections.
Can I reuse removed cabinets?
Yes, if removed carefully. Concealed screw cabinets reuse easily. Adhesive-attached cabinets may have damaged backs requiring repair. Cam lock cabinets can be disassembled and reassembled multiple times.
What if I can’t find any attachment at all?
Some cabinets were installed with finish nails only (older installations) or have attachment points you’re missing. Use flashlight to inspect thoroughly. When in doubt, start gentle prying at top corner—the resistance will tell you about attachment strength.
Should I remove countertops first or base cabinets first?
Remove countertops first. Base cabinets typically screw up into underside of countertop. Removing countertop first provides access and reduces weight.
How do I disconnect plumbing for sink cabinet removal?
Turn off water supply valves under sink. Disconnect supply lines and P-trap drain. Have bucket ready for residual water. If garbage disposal is present, unplug or disconnect electrical before removing.
Bottom Line
No visible screws doesn’t mean no attachment—it means hidden attachment. Check inside cabinets along the top hanging rail, behind decorative caps, and at cabinet-to-cabinet connections. Most concealed screw cabinets take 10-15 minutes each to remove once you locate the fasteners.
For adhesive-attached cabinets, patience and the right prying technique prevent wall damage. Score edges first, work slowly from top down, and use heat if adhesive resists.
With proper preparation and the right tools, any cabinet removal is manageable—even without a single visible screw.