
I’ve been using Ruggable rugs for years now. And somewhere along the way, I discovered that the pad underneath is just as versatile as the washable covers everyone talks about.
A friend first introduced me to some of these tricks. She’d been experimenting with her Ruggable setup long before I got mine, and honestly, her suggestions changed how I think about these pads entirely. They’re not just grip layers—they’re surprisingly useful tools for solving everyday home problems.
Here are the hacks that have actually made a difference in my home. No fluff. Just practical ideas you can try today.
What Makes Ruggable Pads Worth Hacking?
Before diving into specific tricks, it helps to understand what you’re working with.
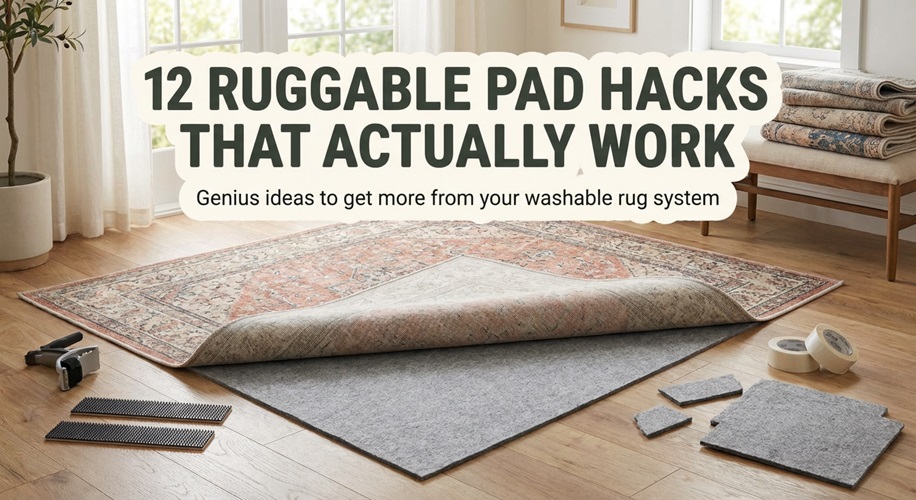
Ruggable pads feature a non-slip base and a grip-top surface designed to hold rug covers in place. This dual-texture design—sticky on top, grippy on bottom—opens up possibilities beyond their intended use.
The pads come in two versions:
- Standard pad: Thinner profile, works on hard floors
- Cushioned pad: Extra padding, more comfortable underfoot
Both versions respond well to these hacks. Your results may vary slightly based on which type you own.
Hack #1: The Hair Dryer Flatten Trick
The problem: Your rug cover arrived with stubborn creases and wrinkles that won’t relax.
The solution: Grab a hair dryer.
Set it to medium heat and hold it about 6 inches from the wrinkled area. Move slowly across the crease while gently pressing the fabric flat with your other hand (or have someone help). The heat relaxes the fibers, allowing them to settle into position.
Why it works: Ruggable covers are made from synthetic materials that respond to gentle heat. The warmth loosens the fiber memory created during shipping and storage.
What to avoid: Don’t use high heat or hold the dryer in one spot too long. Synthetic fibers can melt or become shiny if overheated.
Time required: 5-10 minutes for most rugs
Hack #2: Double-Pad Layering for Serious Cushion
The problem: You love your Ruggable but wish it felt more plush underfoot.
The solution: Stack two pads.
Place your cushioned Ruggable pad on the floor first. Then add a standard pad on top. Finally, attach your rug cover to the top layer as usual.
This creates a noticeably thicker, more cushioned feel—especially helpful in living rooms where you sit on the floor, kids’ play areas, or anywhere you stand for extended periods.
Pro tip: The bottom pad doesn’t need to be a Ruggable brand. Any quality non-slip rug pad works as the base layer.
Consideration: This adds thickness that might affect how doors swing or how furniture sits. Measure clearances before committing.
Hack #3: Custom-Cut Pads for Awkward Spaces
The problem: Your Ruggable pad is too large for the space, or you need a specific shape.
The solution: Cut it yourself.
Ruggable pads trim easily with sharp scissors or a utility knife. Mark your cutting lines with painter’s tape first for clean, straight edges. Cut from the bottom (non-grip side) for better control.
Best applications:
- Entryway runners that need to fit between door swing and wall
- L-shaped kitchen areas
- Bathroom floors around toilet bases
- Closet floors with unusual dimensions
Important: Cut slightly smaller than your final size—you can always trim more, but you can’t add material back.
Hack #4: The Baking Soda Deep Refresh
The problem: Your rug pad has developed a musty smell or absorbed odors from pets, cooking, or humidity.
The solution: Baking soda treatment.
Detach the rug cover and lay the pad flat. Sprinkle baking soda liberally across the entire surface—don’t be shy with it. Let it sit for 4-8 hours (overnight is ideal). Vacuum thoroughly using the upholstery attachment.
For stubborn odors: Add 10-15 drops of essential oil to the baking soda before sprinkling. Tea tree oil fights mildew smells. Lavender works for general freshening. Eucalyptus tackles pet odors effectively.
How often: Every 2-3 months for regular maintenance, or immediately after any spill or moisture exposure.
Hack #5: Rubber Squeegee Pet Hair Removal
The problem: Pet hair embeds itself into the pad’s textured surface and won’t vacuum out.
The solution: Use a rubber squeegee or rubber broom.
The rubber creates friction that pulls embedded hair to the surface where vacuuming actually works. Run the squeegee firmly across the pad in one direction, gathering the hair as you go.
Alternative tools:
- Rubber dish gloves (dampen slightly and run across surface)
- Lint roller on a paint roller extension
- Rubber pet hair removal brush
Timing: Do this before washing or deep cleaning for best results. Removing surface hair first prevents it from clogging your washing machine.
Hack #6: Vinegar Solution for Spot Cleaning
The problem: Spills or stains on your pad that you’d rather not wash entirely.
The solution: DIY cleaning spray.
Mix one part white vinegar with two parts water in a spray bottle. Add a few drops of dish soap. Spray the affected area, let sit for 5 minutes, then blot with a clean cloth.
Before using: Test on a small, hidden area first. Most Ruggable pads handle this solution fine, but fabric responses can vary.
For tough stains: Make a paste with baking soda and a small amount of the vinegar solution. Apply to the stain, let dry completely, then vacuum. The fizzing action helps lift set-in stains.
Hack #7: Flip Your Reversible Covers Strategically
The problem: High-traffic areas show wear while the rest of the rug looks new.
The solution: Rotate and flip regularly.
If your Ruggable cover is reversible, flip it every 2-3 months to distribute wear evenly. Even non-reversible covers benefit from 180-degree rotation (turning the rug so the opposite end faces your main traffic pattern).
Create a schedule:
- New Year: Flip/rotate
- Spring cleaning: Flip/rotate
- Back to school: Flip/rotate
- Holiday prep: Flip/rotate
This simple habit can double the visual lifespan of your rug cover.
Hack #8: Under-Bowl Slip Prevention for Pets
The problem: Pet food and water bowls slide around, creating messes and spills on your floors.
The solution: Cut small pad pieces for under bowls.
Trim a section of Ruggable pad slightly larger than your pet bowl footprint. Place it under the bowls. The non-slip backing keeps everything in place, and the waterproof surface protects your floor from splashes.
Bonus benefit: These small pieces are easy to pick up and wash when they get dirty—much simpler than cleaning floor mats.
Sizing tip: Cut pieces about 2 inches larger than your bowl arrangement on all sides to catch any spillover.
Hack #9: The Tennis Ball Post-Wash Fluff
The problem: Your rug pad comes out of the dryer flat and compressed.
The solution: Dryer balls or tennis balls.
Add 2-3 clean tennis balls or wool dryer balls to the dryer with your pad. They bounce against the fabric during the cycle, preventing clumping and restoring loft.
Temperature note: Always use low heat or air-dry settings. High heat damages the pad’s non-slip coating and can cause shrinkage.
Alternative: If you air-dry your pad, shake it vigorously every hour during drying. This prevents that stiff, flat feeling.
Hack #10: Entryway Mat Conversion
The problem: You need a durable, washable entry mat but don’t want to buy a separate product.
The solution: Repurpose a small Ruggable or leftover pad material.
Cut a section of pad to your desired entry mat size (typically 2′ x 3′ or 3′ x 4′). Use it as a base under a small rug or even on its own as a simple wipe-your-feet zone.
Enhancement: Apply fabric paint or stencil a design directly onto a plain cover piece for a custom look. Fabric paint marketed for outdoor use holds up best to foot traffic.
Practicality: Entry areas get the dirtiest. Having a washable system at your door protects the rest of your home.
Hack #11: Under Exercise Equipment Protection
The problem: Workout equipment scratches floors and creates noise during use.
The solution: Ruggable pad as equipment mat.
Cut sections to fit under:
- Stationary bikes
- Rowing machines
- Weight benches
- Yoga/exercise areas
- Treadmills (edges and high-friction points)
The cushioned pad absorbs vibration and impact while the non-slip base protects flooring from scratches and scuffs.
Cleaning advantage: Sweat happens. Being able to throw these sections in the wash beats trying to clean traditional gym mats.
Hack #12: The Hot Glue Corner Fix
The problem: Rug corners curl upward, creating tripping hazards and an untidy appearance.
The solution: Strategic hot glue application.
Apply small dots of hot glue to the underside of curled corners. Press firmly onto the pad and hold for 30 seconds. The glue creates additional grip that keeps corners flat.
Application tips:
- Use low-temperature hot glue to avoid fabric damage
- Apply glue dots (not lines) for easier future removal
- Space dots about 1 inch apart along the curled edge
Removal: When you need to wash, the glue peels off relatively easily from both surfaces. Reapply after washing.
Quick Reference: Which Hack Solves What
| Problem | Best Hack | Difficulty |
|---|---|---|
| Shipping wrinkles won’t flatten | Hair dryer trick | Easy |
| Rug feels too thin | Double-pad layering | Easy |
| Pad too big for space | Custom cutting | Moderate |
| Musty or pet odors | Baking soda refresh | Easy |
| Embedded pet hair | Rubber squeegee | Easy |
| Spot stains | Vinegar solution | Easy |
| Uneven wear patterns | Regular rotation | Easy |
| Pet bowls sliding | Under-bowl pads | Easy |
| Flat after washing | Tennis ball fluff | Easy |
| Need entry mat | Pad conversion | Moderate |
| Gym equipment damage | Equipment padding | Moderate |
| Curling corners | Hot glue fix | Easy |
Hacks That Don’t Work as Well as Claimed
Not everything you read online delivers results. Here’s what I’ve tested and found disappointing:
Outdoor use without protection: Ruggable pads aren’t designed for outdoor exposure. UV rays degrade the materials, rain causes moisture damage, and temperature extremes affect the non-slip backing. If you must use one outside, keep it under a covered area and bring it in during inclement weather.
Freezer method for gum removal: This works better on traditional rugs than Ruggable covers. The synthetic fibers don’t respond the same way, and you risk damaging the grip coating.
Steam cleaning the pad: High heat and moisture can warp the pad and reduce its grip effectiveness. Stick to spot cleaning or machine washing on gentle cycles.
Using adhesive tape for grip: Duct tape, carpet tape, and similar adhesives leave residue and can damage the pad’s surface when removed. Hot glue works better for temporary fixes.
Caring for Your Pad to Make Hacks Work Better
These hacks perform best when your pad is in good condition. Basic maintenance makes everything more effective.
Washing frequency:
- Every 3-6 months for normal use
- Monthly if you have pets or allergies
- Immediately after spills or accidents
Washing method:
- Machine wash cold or warm (never hot)
- Gentle cycle only
- Mild detergent, no fabric softener
- Tumble dry low or air dry
Storage tips:
- Roll, don’t fold (prevents permanent creases)
- Store in climate-controlled spaces
- Keep away from direct sunlight
Replacement timing:
Most Ruggable pads last 3-5 years with proper care. Replace when:
- Non-slip backing no longer grips
- Cushioning feels flat and compressed
- Odors persist despite cleaning
- Visible damage or deterioration
Making the Most of Your Setup
The best Ruggable pad hack is simply using the system as intended—then building from there.
Start with proper placement and attachment. Ensure your pad lies completely flat with no bunching. Attach the cover smoothly without trapped air pockets. Get the basics right first.
Then experiment. Try the hacks that address your specific frustrations. Not everyone needs pet bowl solutions or gym equipment protection. Focus on what improves your daily experience.
Document what works for you. Conditions vary—your humidity levels, pet situation, foot traffic patterns, and flooring type all affect results. What works perfectly in one home might need adjustment in another.
Frequently Asked Questions
Can I use a non-Ruggable pad under a Ruggable cover?
The cover attaches best to Ruggable’s own pads because of the matching grip system. However, any quality non-slip rug pad works if you’re not concerned about the cling feature. The cover will lay on top rather than attach, so it may shift more during use.
How do I fix a pad that’s lost its grip?
Try washing it first—dirt and residue often cause grip loss. If washing doesn’t help, the backing may have worn out. Some users report success lightly sanding the non-slip backing with fine sandpaper to restore texture, but this voids any warranty.
Can I put Ruggable pads in the dryer?
Yes, but only on low heat or air-dry settings. High heat damages the non-slip backing and can cause shrinkage. Adding tennis balls or dryer balls helps restore cushion and prevents clumping.
Why does my pad bunch up under the cover?
Usually this happens because the cover was attached too quickly without smoothing. Detach, let both pieces lay flat for an hour, then reattach slowly from one end to the other, smoothing as you go. Humidity can also cause bunching—try reducing bathroom humidity if that’s where your rug is placed.
Are these hacks safe for all floor types?
Most hacks work on any flooring. However, the hot glue method should be tested carefully on delicate floors like unsealed hardwood. The glue won’t damage the rug, but any residue on flooring could cause issues. When in doubt, test in an inconspicuous area.
Final Thoughts
Ruggable pads offer more versatility than most people realize. The same properties that make them effective rug foundations—non-slip backing, durability, washability—translate into useful applications throughout your home.
Start with one or two hacks that address problems you’re actually experiencing. There’s no need to implement everything at once. As you get comfortable with the possibilities, you’ll likely discover your own variations that work even better for your specific situation.
The goal isn’t to reinvent your rug system. It’s to get more value from something you’ve already invested in. These hacks help you do exactly that—without spending extra money or creating extra work.
Try what makes sense. Skip what doesn’t. And enjoy a rug setup that works harder for your home.