
You can remove stuck toilet seat plastic bolts using three methods: applying penetrating lubricant, using controlled heat to soften the plastic, or cutting the bolts as a last resort. Lubricant works best for minor corrosion and mineral buildup. Heat helps when plastic has swelled or deformed. Cutting is the guaranteed solution when nothing else works.
Stuck plastic bolts are frustrating but fixable. The key is starting with the gentlest approach and escalating only if necessary. Rushing straight to cutting wastes perfectly good hardware and risks damaging your toilet.
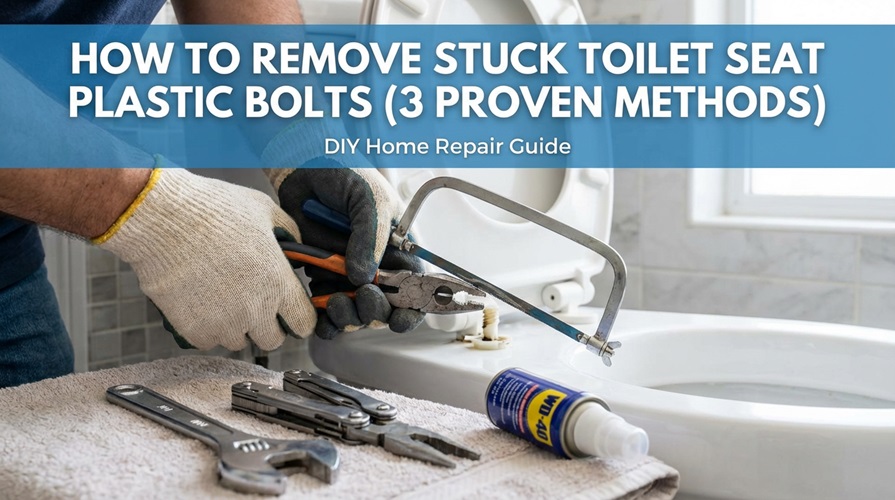
Here’s exactly how to free those stubborn bolts and get your toilet seat replaced.
Quick Answer
Best approach for stuck toilet seat plastic bolts:
| Situation | Method | Time Required |
|---|---|---|
| Minor sticking, some resistance | Lubricant | 15-30 minutes |
| Swollen or deformed plastic | Heat application | 10-20 minutes |
| Severely corroded or stripped | Cut and replace | 5-15 minutes |
Start with lubricant. It’s the safest method and preserves your hardware. Move to heat if lubricant fails after 30 minutes. Cut only when both methods prove unsuccessful.
Why Toilet Seat Plastic Bolts Get Stuck
Understanding why bolts seize helps you choose the right removal method—and prevent the problem next time.
Mineral Buildup and Corrosion
Every flush splashes water containing minerals onto the bolt area. Over time, calcium, lime, and other deposits accumulate on the threads, essentially cementing the bolt in place. Hard water areas experience this problem more severely.
Humidity and Plastic Swelling
Bathrooms are moisture-rich environments. Plastic absorbs small amounts of water over time, causing it to swell slightly. Even microscopic expansion can make threads bind tightly together.
Overtightening During Installation
Plastic bolts have lower torque limits than metal fasteners. Overtightening deforms the plastic, creating binding that worsens over time. The bolt may appear fine initially but becomes impossible to remove years later.
Age and Material Degradation
Plastic becomes brittle with age, especially when exposed to cleaning chemicals and temperature fluctuations. Older bolts may have micro-fractures that cause them to grip threads abnormally or break when turned.
Mechanical Stress
Years of sitting pressure gradually compress and deform plastic bolts. This constant stress changes their shape just enough to prevent normal removal.
Tools and Materials You’ll Need
Different methods require different tools. Gather what you need based on your chosen approach.
For Lubricant Method
- Penetrating oil (WD-40, PB Blaster, or similar)
- Adjustable wrench or pliers
- Flathead and Phillips screwdrivers
- Old towels or rags
- Rubber gloves (optional)
For Heat Method
- Torch lighter or heat gun
- Adjustable wrench or pliers
- Heat-resistant gloves
- Fire extinguisher nearby (safety precaution)
- Wet cloth for cooling
For Cutting Method
- Hacksaw with fine-tooth blade, or
- Oscillating multi-tool with cutting blade, or
- Rotary tool (Dremel) with cutting wheel
- Safety glasses
- Replacement bolts and nuts
- Masking tape (protects toilet surface)
General Supplies
- Cleaning cloths
- Bathroom cleaner or vinegar solution
- Replacement toilet seat hardware (have ready just in case)
Method #1: Using Penetrating Lubricant
Best for: Minor to moderate sticking, visible mineral deposits, first attempt
Success rate: Works in approximately 60-70% of cases
This is the safest method that preserves your existing hardware. Start here before trying anything more aggressive.
Step-by-Step Process
Step 1: Prepare the Area
Open a window or turn on the bathroom fan—penetrating oils have strong fumes. Place old towels under the toilet to catch drips and protect your floor.
Step 2: Access the Bolts
Locate the plastic bolt caps on top of the toilet seat (usually at the back near the tank). Pop them open with a flathead screwdriver to expose the bolt heads. Look underneath the toilet bowl rim to find the nuts.
Step 3: Apply Lubricant Generously
Spray penetrating oil directly onto:
- The bolt head from above
- The nut from below
- All visible threads
- The gap between the bolt and toilet
Use enough that it visibly pools around the hardware.
Step 4: Wait Patiently
This is crucial. Let the lubricant work for:
- Minimum: 15 minutes
- Recommended: 30 minutes
- Stubborn cases: 1-2 hours or overnight
Reapply lubricant every 15 minutes for stubborn bolts.
Step 5: Attempt Removal
Hold the bolt head from above with a screwdriver. Use pliers or an adjustable wrench on the nut below. Turn the nut counterclockwise while holding the bolt steady.
Step 6: Work It Loose
If the nut resists:
- Turn it slightly in both directions to work lubricant into threads
- Apply more lubricant
- Wait another 10-15 minutes
- Try again with firm, steady pressure (not jerking motions)
Tips for Success:
- Don’t force it—plastic bolts strip easily
- If the bolt head spins with the nut, grip it firmly with pliers
- Tap the bolt head gently with a hammer to break corrosion bonds
- Warm lubricant penetrates better (hold the can in warm water first)
Method #2: Applying Heat
Best for: Swollen plastic, failed lubricant attempts, cold bathroom conditions
Success rate: Works in approximately 80% of cases where lubricant failed
Heat expands plastic and softens its grip on the threads. This method requires caution but is highly effective.
Safety Precautions
Before applying heat:
- Turn off water supply to the toilet (valve behind the toilet)
- Flush to empty the tank
- Remove any flammable items from the area
- Have a wet cloth ready to cool surfaces
- Work in a ventilated space
- Keep flame away from any wax ring or plastic toilet components
Step-by-Step Process
Step 1: Apply Lubricant First
Even when using heat, start with lubricant. Apply penetrating oil to the bolt and nut, then wait 5-10 minutes. The combination of heat and lubricant works better than either alone.
Step 2: Heat the Nut
Using a torch lighter or heat gun:
- Focus heat directly on the plastic nut underneath the toilet
- Apply heat for 20-30 seconds
- Keep the flame moving to avoid melting
- Stop when the plastic feels warm to touch (test carefully)
Step 3: Attempt Removal Immediately
While the plastic is warm and expanded:
- Grip the bolt head from above
- Turn the nut counterclockwise
- Work quickly before the plastic cools
Step 4: Repeat If Necessary
If the nut won’t budge:
- Let it cool for 30 seconds
- Reheat for another 20-30 seconds
- Try again immediately after heating
The heating and cooling cycles help break the bond between threads.
Step 5: Cool and Clean
Once removed, wipe away any melted plastic residue with a rag. Clean the bolt holes thoroughly before installing new hardware.
Heat Method Warnings
| Do | Don’t |
|---|---|
| Use short heat bursts | Apply continuous flame |
| Keep flame moving | Focus on one spot too long |
| Work in ventilated area | Inhale plastic fumes |
| Test temperature carefully | Touch hot plastic directly |
| Have water nearby | Leave flame unattended |
Method #3: Cutting the Bolts
Best for: Stripped bolts, severely corroded hardware, when speed matters more than hardware preservation
Success rate: 100% (guaranteed removal)
When lubricant and heat fail, cutting is your guaranteed solution. This destroys the existing hardware but ensures removal without damaging the toilet.
Step-by-Step Process
Step 1: Protect the Toilet Surface
Apply masking tape around the bolt area to prevent scratches from your cutting tool. Place tape on the toilet bowl rim near where you’ll be cutting underneath.
Step 2: Choose Your Cutting Tool
| Tool | Best For | Difficulty |
|---|---|---|
| Hacksaw | Accessible bolts, budget option | Moderate |
| Oscillating multi-tool | Tight spaces, precision | Easy |
| Rotary tool (Dremel) | Speed, tight access | Easy |
| Side-cutting pliers | Thin plastic bolts | Easy |
Step 3: Position for Cutting
For cutting from above:
- Cut through the bolt shank just below the head
- Support the nut from below to prevent spinning
For cutting from below:
- Cut through the bolt between the nut and the toilet bowl
- This is often easier with better visibility
Step 4: Make the Cut
- Wear safety glasses—plastic shards fly
- Cut slowly and steadily
- Apply minimal pressure to avoid slipping
- Let the tool do the work
Step 5: Remove Remaining Pieces
Once cut:
- The bolt head should lift out from above
- The nut and remaining bolt piece should fall away below
- Use pliers to remove any stuck fragments
- Clean the bolt holes thoroughly
Step 6: Inspect the Toilet
Check that:
- Bolt holes are clear of debris
- No cracks developed in the porcelain
- The seating surface is clean and undamaged
After Cutting: Replacement Hardware
When replacing cut bolts, consider upgrading to:
Brass or Stainless Steel Bolts:
- Won’t corrode like plastic
- Stronger and more durable
- Slightly more expensive but worth it
Quick-Release Hinges:
- Modern toilet seats with push-button release
- Eliminates future bolt removal issues
- Easy cleaning access
Anti-Corrosion Coating:
- Apply marine grease or anti-seize compound to new bolts
- Prevents future sticking
- Makes next removal much easier
Alternative Techniques for Stubborn Bolts
When standard methods aren’t working, try these additional approaches.
The Tapping Method
Sometimes vibration breaks corrosion bonds:
- Place a screwdriver on the bolt head
- Tap the screwdriver firmly with a hammer
- Rotate slightly and tap again
- Repeat around the entire bolt head
- Try turning the nut after tapping
The Freezing Method
Cold contracts plastic, potentially breaking the grip:
- Apply canned air (computer duster) upside down to the nut
- This releases extremely cold gas
- The rapid temperature change can crack corrosion
- Try turning immediately while cold
The Soaking Method
For severe mineral buildup:
- Soak rags in white vinegar or CLR
- Wrap soaked rags around the bolts and nuts
- Leave overnight
- The acid dissolves mineral deposits
- Apply lubricant and try removal
The Vibration Method
Using an oscillating tool:
- Attach a scraper blade (not cutting blade)
- Press against the stuck nut
- Turn on the tool—vibration loosens corrosion
- Try turning the nut while vibrating nearby
Preventing Stuck Bolts in the Future
Save yourself future frustration with these preventive measures.
At Installation
Apply Anti-Seize Compound:
- Coat bolt threads before installation
- Use marine grease or plumber’s grease
- Creates a barrier against moisture and minerals
Don’t Overtighten:
- Hand-tighten only, then 1/4 turn more
- Plastic bolts need snug, not tight
- If the seat doesn’t wobble, it’s tight enough
Consider Metal Hardware:
- Brass or stainless steel bolts resist corrosion
- Slightly more difficult to install but far easier to remove later
- Worth the small additional cost
Regular Maintenance
Annual Inspection:
- Check bolts once yearly
- Look for corrosion or mineral buildup
- Address issues before they become problems
Periodic Loosening:
- Every 1-2 years, loosen and retighten bolts
- Apply fresh lubricant to threads
- Prevents complete seizing
Moisture Control:
- Use bathroom ventilation fan during and after showers
- Reduces humidity that causes swelling
- Helps all bathroom hardware last longer
Frequently Asked Questions
Why won’t my toilet seat plastic bolts turn at all?
Complete immobility usually indicates severe mineral buildup, plastic deformation from overtightening, or material bonding from age. Try the lubricant method first, letting penetrating oil soak overnight. If that fails, heat is your next option. Cutting guarantees removal when nothing else works.
Can I use metal bolts instead of plastic?
Yes, and many professionals recommend it. Brass or stainless steel bolts resist corrosion better than plastic and are easier to remove in the future. The only downside: metal can crack porcelain if severely overtightened. Hand-tighten plus one quarter turn is sufficient.
Will heating plastic bolts damage my toilet?
Brief, controlled heat application won’t damage porcelain toilets. Focus the flame on the plastic nut only, use short 20-30 second bursts, and keep the flame moving. Avoid directing heat at the porcelain, wax ring, or any plastic toilet components.
What if the bolt head strips when I try to turn it?
If the screwdriver slot strips, try these approaches:
- Cut a deeper slot with a hacksaw for better screwdriver grip
- Use locking pliers to grip the bolt head directly
- Cut the bolt off as described in Method #3
- Use a screw extractor bit designed for stripped screws
How do I remove a spinning bolt that won’t come out?
When the bolt spins with the nut (no grip from above):
- Have someone hold the bolt head with pliers while you turn the nut
- Wedge a screwdriver between the bolt head and seat to prevent spinning
- Apply upward pressure on the bolt while turning the nut
- If nothing works, cut the bolt shank from below
Is WD-40 good for loosening stuck toilet bolts?
WD-40 works but isn’t ideal. It’s a water displacer, not a true penetrating oil. Better options include:
- PB Blaster
- Liquid Wrench
- Kroil
- Any product labeled “penetrating oil”
These products are specifically designed to break corrosion bonds.
Can I use a drill to remove stuck plastic bolts?
Drilling through plastic bolts is possible but risky—you might damage the porcelain. If drilling:
- Use a small bit (1/8″) first
- Drill slowly with minimal pressure
- Stop immediately if the bit catches
- Cutting is usually safer and faster
How long should I let lubricant soak?
Minimum 15 minutes, but longer is better:
- Light sticking: 15-30 minutes
- Moderate resistance: 1-2 hours
- Severe corrosion: Overnight
Reapply lubricant periodically during the soaking time.
Quick Reference: Removal Decision Guide
Use this guide to choose your approach:
| Symptom | Likely Cause | Best Method |
|---|---|---|
| Slight resistance when turning | Minor corrosion | Lubricant |
| Won’t turn but no visible damage | Mineral buildup | Lubricant (extended soak) |
| Bolt head spins with nut | Stripped or deformed | Cutting |
| Visible white/green deposits | Hard water minerals | Vinegar soak + lubricant |
| Plastic looks swollen | Moisture absorption | Heat |
| Bolt cracks when turning | Age/brittleness | Cutting |
| Multiple bolts stuck | Overtightened installation | Start lubricant, prepare to cut |
What You’ll Need for Reinstallation
After removing stuck bolts, have replacement hardware ready:
Basic Replacement Kit:
- New toilet seat bolts (plastic or metal)
- Matching nuts and washers
- Anti-seize compound or marine grease
Upgrade Options:
- Stainless steel bolt set
- Quick-release hinge system
- Soft-close toilet seat (often includes premium hardware)
Installation Tips:
- Clean bolt holes thoroughly before installation
- Apply anti-seize to new bolt threads
- Hand-tighten only—don’t use tools
- Check for wobble; tighten slightly if needed
- Don’t overtighten under any circumstances
Wrap Up
Stuck toilet seat plastic bolts are annoying but entirely fixable. The three-method approach—lubricant, heat, then cutting—handles virtually every situation.
Key takeaways:
- Start gentle: Always try lubricant first to preserve hardware
- Be patient: Let penetrating oil work for at least 15-30 minutes
- Use heat carefully: Short bursts, constant movement, proper ventilation
- Don’t hesitate to cut: When other methods fail, cutting guarantees results
- Prevent future problems: Use anti-seize compound and don’t overtighten
Most stuck bolts yield to lubricant with patience. If yours don’t, heat usually does the trick. And when all else fails, a few seconds with a cutting tool solves the problem permanently.
Have replacement hardware ready just in case, and consider upgrading to brass or stainless steel bolts—you’ll thank yourself the next time you need to remove them.
Good luck!