
Yes, a toilet and sink can share a vent. Most modern plumbing systems use shared venting to reduce materials and simplify installation. However, the shared vent must meet specific requirements: proper pipe sizing (typically 2-3 inches minimum for shared vents), correct slope (1/4 inch per foot), and appropriate distances between fixtures and the vent stack according to local plumbing codes.
Shared venting works effectively when installed correctly. Problems arise when pipe sizes are too small, distances exceed code limits, or slopes are incorrect. Understanding these requirements before installation prevents slow drainage, gurgling sounds, and sewer gas odors.
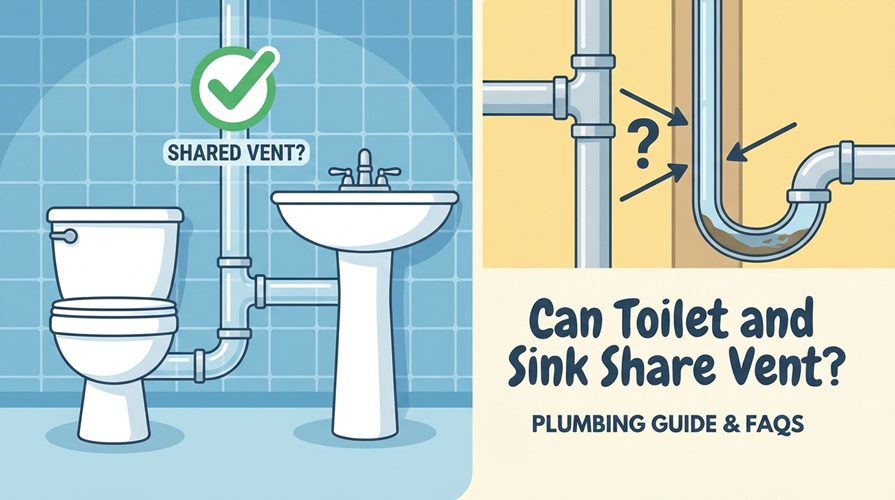
Here’s everything you need to know about properly sharing a vent between your toilet and sink.
Quick overview of Sink Share
→ Yes, when properly sized and installed according to code
→ The shared vent pipe must handle the combined fixture unit load
→ Distance limits between fixtures and vent must be observed
→ Pipe sizing depends on the number and type of fixtures connected
Key requirements:
- Minimum 2-inch vent for toilet and sink combination
- 3-inch recommended for multiple fixtures
- Maximum distances vary by fixture and pipe size
- Proper slope maintained throughout drainage system
Do Toilets Need a Separate Vent?
No, toilets don’t require dedicated vents in most plumbing configurations. Modern plumbing codes allow—and often encourage—shared venting to reduce complexity and materials.
How Shared Venting Works
Every plumbing fixture needs venting to:
- Allow air into the drainage system
- Prevent siphoning of trap water
- Enable proper waste flow
- Block sewer gases from entering living spaces
When fixtures share a vent, a single vent pipe serves multiple fixtures. This works because:
- Fixture units combine: Each fixture has a drainage fixture unit (DFU) value. The shared vent must accommodate the total.
- Air flows both ways: The vent allows air in when fixtures drain and releases pressure when needed.
- Proximity matters: Fixtures close together can effectively share ventilation.
Fixture Unit Values
| Fixture | Drainage Fixture Units (DFU) |
|---|---|
| Toilet (1.6 GPF or less) | 3 |
| Toilet (older, higher flow) | 4 |
| Bathroom sink | 1 |
| Kitchen sink | 2 |
| Bathtub | 2 |
| Shower | 2 |
| Washing machine | 2 |
Example: A toilet (3 DFU) and bathroom sink (1 DFU) together equal 4 DFU. A 2-inch vent can typically handle up to 8 DFU, making this combination acceptable.
Requirements for Sharing a Vent Between Toilet and Sink
Three primary factors determine whether your toilet and sink can successfully share a vent.
Factor #1: Pipe Sizing
Incorrect pipe sizing causes most shared venting problems. Each component needs appropriate dimensions.
Drain Pipe Sizes:
| Component | Minimum Size | Recommended Size |
|---|---|---|
| Bathroom sink drain | 1-1/4″ | 1-1/2″ |
| Kitchen sink drain | 1-1/2″ | 2″ |
| Toilet drain | 3″ | 3″ (code minimum) |
| Shared vent (toilet + sink) | 2″ | 3″ |
| Main vent stack | 3″ | 4″ |
Why sizing matters:
- Undersized drains: Create slow drainage and frequent clogs
- Undersized vents: Cause gurgling, slow draining, and siphoned traps
- Oversized isn’t problematic: Larger pipes work fine; smaller ones don’t
The rule: The shared vent should match or exceed the largest drain connected to it. Since toilets require 3-inch drains, a 3-inch shared vent is often the safest choice.
Factor #2: Distance Limits
Plumbing codes specify maximum distances between fixtures and their vents. Exceeding these distances compromises venting effectiveness.
Maximum Trap Arm Distances (Based on Pipe Size):
| Drain Pipe Size | Maximum Distance to Vent |
|---|---|
| 1-1/4″ | 2.5 feet (30 inches) |
| 1-1/2″ | 3.5 feet (42 inches) |
| 2″ | 5 feet (60 inches) |
| 3″ | 6 feet (72 inches) |
| 4″ | 10 feet (120 inches) |
Toilet-specific requirements:
- Most codes allow toilets up to 6 feet from the vent
- Some jurisdictions permit up to 10 feet with a 3-inch drain
- Wet venting configurations may have different limits
Why distance matters:
When fixtures are too far from the vent:
- Air can’t reach the drain quickly enough
- Water siphons trap seals dry
- Drainage slows significantly
- Sewer gases enter living spaces
Factor #3: Proper Slope
All horizontal drain pipes must slope toward the main drain. Incorrect slope causes drainage problems regardless of venting.
Required slopes:
| Pipe Size | Minimum Slope | Maximum Slope |
|---|---|---|
| 2″ and smaller | 1/4″ per foot | 1/2″ per foot |
| 3″ and larger | 1/8″ per foot | 1/2″ per foot |
Slope calculation example:
For a 6-foot horizontal run of 2-inch pipe:
- Minimum drop: 6 feet × 1/4 inch = 1.5 inches
- Maximum drop: 6 feet × 1/2 inch = 3 inches
Common slope mistakes:
- Too little slope: Water pools, causing slow drainage and buildup
- Too much slope: Water outruns waste, leaving solids behind
- Uneven slope: Creates low spots where waste accumulates
Types of Shared Venting Configurations
Several venting methods allow toilets and sinks to share ventilation.
Wet Venting
The most common method for bathroom fixtures.
How it works:
The drain pipe from one fixture serves as both drain and vent for another fixture. Typically, the sink drain acts as a wet vent for the toilet.
Requirements:
- Wet vent pipe must be one size larger than normally required
- Maximum of two fixture units can drain into a 1-1/2″ wet vent
- Horizontal wet vents have stricter length limits
Example configuration:
Sink → 1-1/2″ drain → connects to 2″ horizontal pipe → toilet drain connects below → continues to main stack
Common Vent
Two fixtures on opposite sides of a wall share a single vent.
How it works:
Back-to-back fixtures (like bathroom sinks in adjacent bathrooms) connect to a common vent between them.
Requirements:
- Fixtures must be at same level
- Vent connects at the intersection of the two trap arms
- Works well for back-to-back bathroom layouts
Circuit Venting
Used when multiple fixtures connect to a horizontal branch.
How it works:
A single vent serves multiple fixtures connected to the same horizontal drain.
Requirements:
- Limited to 8 fixture units total
- Vent must connect between last two fixtures on branch
- All fixtures must be on same floor level
Stack Venting
Fixtures connect directly to a vertical drain/vent stack.
How it works:
The main vertical stack serves as both drain and vent for fixtures connected to it.
Requirements:
- Fixtures must connect within specific distance of stack
- Stack must extend through roof as vent
- Most common in multi-story buildings
Common Problems When Sharing Vents
When shared venting is done incorrectly, several issues emerge.
Problem #1: Slow Drainage
Symptoms:
- Water drains slowly from sink or toilet
- Toilet doesn’t flush completely
- Standing water in fixtures
Causes:
- Undersized vent pipe
- Vent blockage (debris, bird nests, ice)
- Excessive distance to vent
- Improper slope
Solutions:
- Verify vent size meets combined fixture requirements
- Check roof vent for obstructions
- Confirm distances are within code limits
- Adjust pipe slope if accessible
Problem #2: Gurgling Sounds
Symptoms:
- Bubbling or gurgling when toilet flushes
- Sounds from sink when toilet drains
- Air burping through fixtures
Causes:
- Inadequate venting capacity
- Partial vent blockage
- Negative pressure in drain system
Solutions:
- Increase vent size
- Clear any blockages
- Add air admittance valve (where code permits)
- Verify vent extends properly through roof
Problem #3: Sewer Gas Odors
Symptoms:
- Rotten egg smell in bathroom
- Odors worsen when fixtures drain
- Smell strongest near drains
Causes:
- Trap water siphoned out (due to poor venting)
- Dried trap (infrequently used fixtures)
- Cracked or damaged trap
- Blocked vent causing pressure issues
Solutions:
- Run water in all fixtures to refill traps
- Check vent for blockages
- Inspect traps for damage
- Consider trap primer for rarely-used fixtures
Problem #4: Frequent Clogs
Symptoms:
- Recurring blockages in toilet or sink
- Plunging provides only temporary relief
- Multiple fixtures affected simultaneously
Causes:
- Undersized drain or vent pipes
- Improper slope creating waste accumulation
- Vent blockage reducing flow efficiency
Solutions:
- Professional drain camera inspection
- Increase pipe sizes if undersized
- Correct slope issues
- Clear vent obstructions
Step-by-Step: How to Plan Shared Venting
Planning shared venting correctly prevents problems later.
Step 1: Check Local Codes
Plumbing codes vary by jurisdiction. Before planning:
- Contact local building department
- Obtain current plumbing code requirements
- Ask about permit requirements
- Verify acceptable venting methods
Major code variations:
- International Plumbing Code (IPC) used in many states
- Uniform Plumbing Code (UPC) used in western states
- State and local amendments may apply
Step 2: Calculate Fixture Units
Add the drainage fixture units for all fixtures sharing the vent:
Example bathroom:
- Toilet: 3 DFU
- Sink: 1 DFU
- Total: 4 DFU
Step 3: Determine Vent Size
Select vent size based on total fixture units:
| Total DFU | Minimum Vent Size |
|---|---|
| 1-4 | 1-1/2″ |
| 5-8 | 2″ |
| 9-18 | 2″ |
| 19-36 | 3″ |
For toilet and sink: 2-inch minimum, 3-inch recommended
Step 4: Measure Distances
Verify fixture placement meets distance requirements:
- Measure from each fixture trap to proposed vent connection
- Compare against maximum distances for pipe sizes
- Adjust layout if limits exceeded
Step 5: Plan the Route
Map the complete drainage and venting path:
- Identify main stack location
- Plan horizontal runs with proper slope
- Locate vent connections within distance limits
- Ensure vent extends through roof properly
Step 6: Consider Alternatives
If standard venting is challenging:
- Air Admittance Valves (AAVs): One-way valves allowing air in but not out. Permitted in many jurisdictions for individual fixtures.
- Island venting: Special configuration for fixtures away from walls
- Loop venting: For fixtures that can’t connect directly to vent stack
Professional vs. DIY Installation
When to Hire a Professional
Hire a licensed plumber if:
- You’re unfamiliar with local plumbing codes
- The project requires permits
- Multiple fixtures are involved
- Access to existing plumbing is limited
- The main stack or sewer connection is affected
Benefits of professional installation:
- Code compliance guaranteed
- Proper sizing and slope verified
- Warranty on workmanship
- Permit handling included
- Insurance coverage for problems
DIY Considerations
DIY may be appropriate if:
- You have plumbing experience
- Local codes permit homeowner work
- The project is straightforward
- You can obtain necessary permits
Essential DIY knowledge:
- Understanding of drainage and venting principles
- Ability to read and interpret plumbing codes
- Proper tool selection and use
- Inspection requirements in your area
Frequently Asked Questions
How far can a toilet be from the vent stack?
Most plumbing codes allow toilets up to 6 feet from the vent with a 3-inch drain pipe. Some jurisdictions permit up to 10 feet. The critical measurement is the horizontal distance from the toilet flange to where the vent connects. Check your local code for specific requirements, as distances vary.
Can a toilet and shower share a vent with a sink?
Yes, multiple bathroom fixtures commonly share venting. The combined fixture unit load must not exceed the vent’s capacity. A typical full bathroom (toilet, sink, and tub/shower) totals approximately 6 DFU, which a 2-inch vent can handle. A 3-inch vent is often used for additional safety margin.
What size vent do I need for a toilet and sink?
A 2-inch vent pipe is the minimum for a toilet and sink combination (4 DFU total). However, a 3-inch vent is often recommended, especially if you might add fixtures later or if distances are near maximum limits. When in doubt, go larger—oversized vents work fine.
Why does my sink gurgle when I flush the toilet?
Gurgling indicates inadequate venting. When the toilet flushes, it creates negative pressure in the drain system. Without sufficient venting, this pressure pulls air through the sink’s trap, causing the gurgling sound. Solutions include clearing vent blockages, increasing vent size, or adding an air admittance valve.
Can I use an air admittance valve instead of a traditional vent?
In many jurisdictions, yes—but with limitations. AAVs can serve individual fixtures but cannot replace the main building vent entirely. At least one vent must extend through the roof. Check local codes, as some areas prohibit AAVs entirely or restrict their use to specific situations.
What causes sewer smell when toilet and sink share a vent?
Sewer odors typically result from empty traps or venting problems. Poor venting creates pressure imbalances that can siphon water from traps, breaking the seal that blocks sewer gas. Run water in all fixtures to refill traps. If odors persist, the vent may be blocked or undersized.
Do I need a permit to install shared venting?
Most jurisdictions require permits for new plumbing work, including venting modifications. Permit requirements protect you by ensuring code-compliant installation. Working without permits can create problems when selling your home and may void homeowner’s insurance coverage for water damage.
What happens if the shared vent is too small?
An undersized vent restricts airflow, causing slow drainage, gurgling sounds, and potentially siphoned traps. Fixtures may not drain properly, and sewer odors can enter living spaces. The only solution is increasing vent size to meet the combined fixture unit load.
Quick Reference: Shared Venting Checklist
Use this checklist when planning toilet and sink shared venting:
Sizing:
- Toilet drain: 3″ minimum
- Sink drain: 1-1/4″ to 1-1/2″
- Shared vent: 2″ minimum (3″ recommended)
- Combined fixture units within vent capacity
Distances:
- Toilet within 6 feet of vent (or local code limit)
- Sink within distance allowed for pipe size
- Trap arm lengths verified
Slope:
- Horizontal drains slope 1/4″ per foot (2″ and smaller)
- Larger drains slope 1/8″ per foot minimum
- No sags or low spots in drain lines
Venting:
- Vent extends through roof (or AAV where permitted)
- Vent connections above fixture flood rim
- No horizontal vent sections below drain connections
Code Compliance:
- Local code requirements verified
- Permits obtained if required
- Inspection scheduled if needed
Wrap Up
A toilet and sink can absolutely share a vent—it’s standard practice in residential plumbing. Success depends on proper sizing, correct distances, and appropriate slope throughout the system.